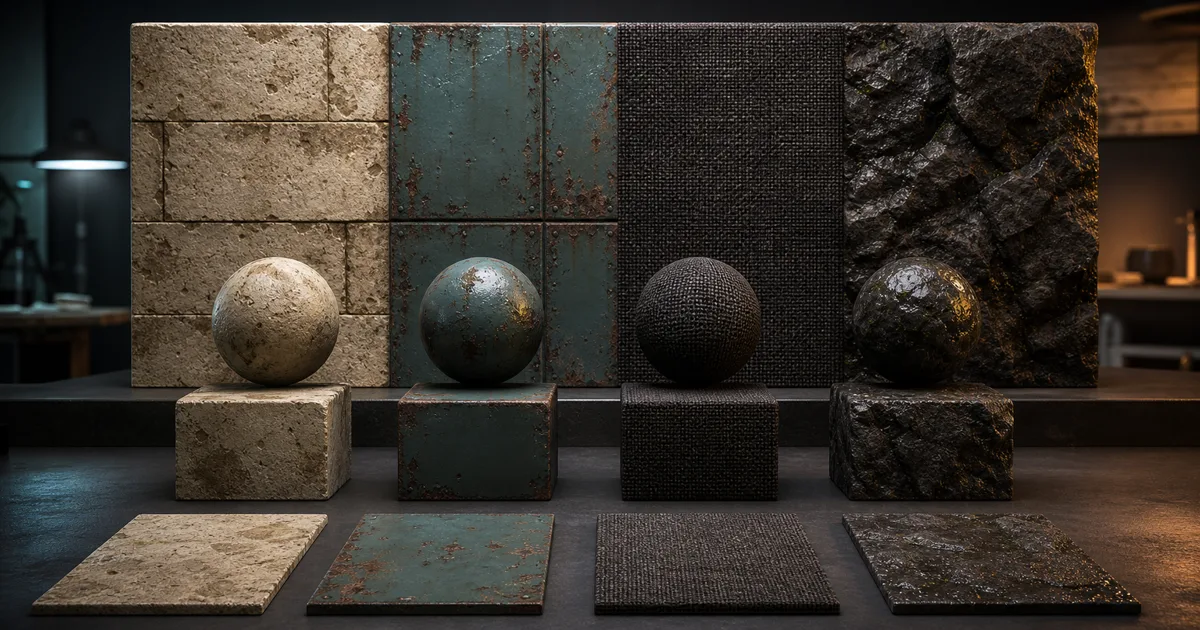
Generative AI textures can turn a sentence, photograph, or concept image into a plausible surface in seconds. That speed is real. So is the distance between a persuasive preview and a material that tiles, responds to light correctly, survives compression, and remains editable when the art direction changes.
This guide treats generation as a controlled material experiment. It explains what the model is actually producing, how to select an input method, which variables deserve explicit constraints, how to keep PBR maps coherent, and how to reject weak outputs early. For generative AI textures, the useful question is not whether the first image looks expensive. It is whether the material still works after the camera moves.
What generative AI textures actually generate
Most generative AI textures begin with a model predicting pixels from a text prompt, an input image, or both. Some systems create only a colour image. Others derive or generate normal, roughness, height, ambient occlusion, and metalness maps around that source. Those are different products, even when both landing pages contain an impressive sphere.
A colour image can suggest cracked paint, soft fabric, or polished stone, but it does not automatically contain physically measured surface data. A bright patch may be pigment, reflected light, a shallow bump, or all three baked together. Converting that ambiguity into PBR maps requires assumptions. Good tools expose those assumptions for adjustment; weak ones hide them behind a large download button.
Think of AI texture generation as proposing a material hypothesis:
- The base colour proposes what the surface reflects under neutral illumination.
- The normal and height maps propose where the surface changes direction or elevation.
- Roughness proposes how sharply reflections spread.
- Metalness proposes which pixels expose a conductor rather than paint, stone, dirt, or fabric.
- AO proposes local occlusion in creases, not a second lighting pass painted over everything.
The maps need to describe one surface at matching coordinates. Six handsome images that disagree about where a crack lives are not a PBR set; they are a committee with no minutes.
Choose the right input for generative AI textures
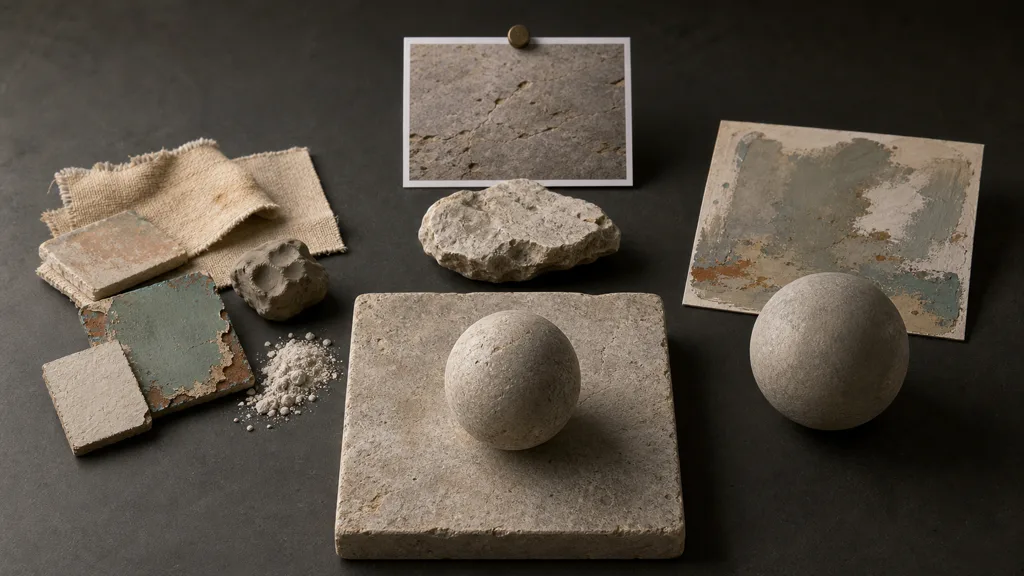
With generative AI textures, the best starting input depends on which facts already exist. Do not force every material through a prompt when a photograph contains the evidence you need, and do not force a photograph to invent art direction it never captured.
Text input is strongest when the material does not exist yet. Describe substances, construction, age, moisture, damage, physical coverage, and exclusions. “Blue industrial wall” is a mood. “Matte blue alkyd paint over galvanized steel, sparse edge chips, dry dust in lower recesses, two metres per tile, no signage” is a material brief.
Photo input is strongest when a real surface should anchor scale and structure. Use even light, a camera close to perpendicular, sufficient overlap, and a known size reference outside the final crop. The photo-to-PBR texture guide covers capture, delighting, and map extraction.
Concept or reference input is strongest when composition and style are known but the source is not material-clean. It needs more interpretation because highlights, shadows, perspective, and painted exaggeration may be mistaken for surface properties. Use the image-to-PBR material guide when reference art is the starting point.
Hybrid inputs often produce the most controllable AI textures: text defines physical rules, a photo anchors microstructure, and a reference image constrains colour or wear language. Keep each input's job explicit. Otherwise the model cheerfully averages your intentions into tasteful beige.
Control material variables instead of describing a mood
Reliable generative AI textures come from constraints that can be inspected. A useful brief defines the material as a stack rather than a bag of adjectives.
Because generative AI textures can satisfy a vague description in many incompatible ways, start with the substrate. Is it limestone, oak, steel, plaster, rubber, or fired clay? Add manufactured layers in order: primer over steel, paint over primer, dust above paint. Then define change mechanisms such as abrasion, oxidation, moisture, UV fading, polishing, or biological growth. Wear should occur where the construction permits it.
Specify these variables before generation:
- Physical scale: metres per tile and the real size of key features.
- Layer order: which substance sits above or replaces another.
- Condition: dry, wet, dusty, polished, oxidized, scorched, or freshly cut.
- Distribution: edges, cavities, exposed faces, traffic zones, or random coverage.
- Directionality: wood grain, brushed metal, runoff, weave, or sediment layers.
- Exclusions: no cast shadows, perspective, objects, borders, writing, large isolated landmarks, or baked highlights.
- Delivery: resolution, tileability, map list, bit depth, normal convention, and engine packing.
Change one variable per iteration. If colour, crack density, wetness, scale, and camera angle all move at once, you learn nothing from the result. Save the prompt, seed or source reference when available, tool version, and accepted output beside the material. A generative texture workflow becomes repeatable when its decisions are recorded rather than remembered approximately.
Build coherent AI PBR maps from one approved source
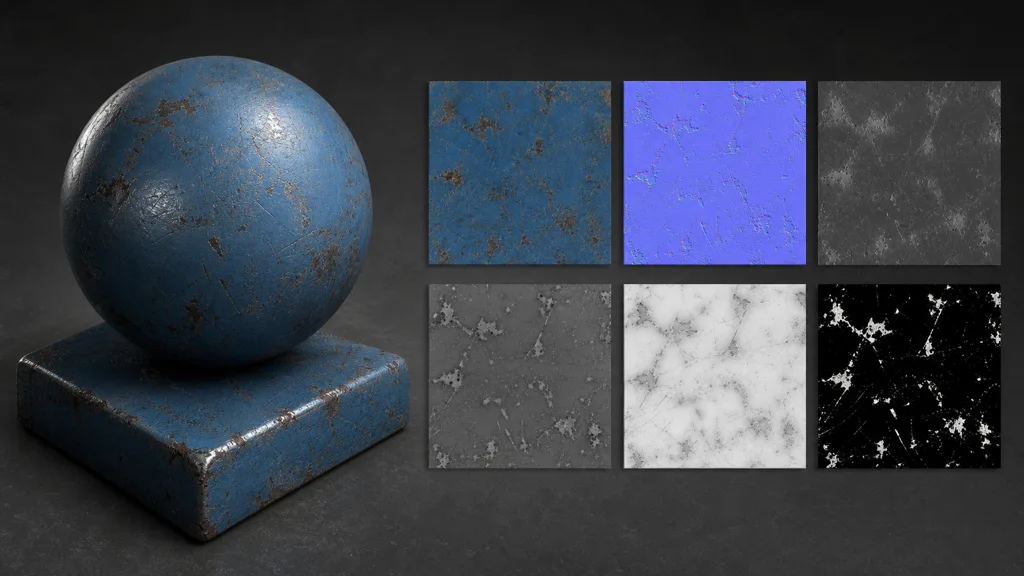
The approved source should become the common coordinate system for all maps. In coherent AI PBR maps, a chip in blue paint exposes steel at the same pixel in base colour, normal, height, roughness, and metalness. Rust can form around exposed metal, but intact blue paint remains dielectric even if it catches a bright reflection.
Audit landmarks rather than judging each map alone:
- Match cracks, seams, fibres, pores, and chipped edges across every map.
- Remove directional light and cast shadows from base colour.
- Keep roughness related to substance and condition, not copied from luminance.
- Keep metalness nearly binary for common materials: exposed metal or dielectric coating.
- Use normal for small directional detail and height for actual elevation relationships.
- Keep AO restrained so cavities do not become permanently dirty black lines.
Derived maps are not automatically inferior to separately generated maps. In fact, generative AI textures derived from one cleaned source often have better registration. The important question is whether the derivation understands material boundaries. A grayscale conversion cannot know that pale chalk is rough while pale polished marble is smooth.
For map-specific checks, use the PBR workflow guide and the normal map guide. Keep an untouched source set before creating packed engine exports.
Make AI-generated textures tile without advertising the loop
An image can be edge-seamless and still repeat badly. AI-generated textures often contain a memorable crack, stain, pebble, knot, or colour island that returns on a perfect grid. The seam is gone; the pattern has started keeping time.
Test the candidate as soon as possible on an eight-by-eight plane. First inspect the joins. Then step back and look for diagonal chains, mirrored clusters, alternating light and dark bands, and features whose scale changes near an edge. Offset the source by half its width and height to place border joins in the centre, repair them, and test again.
Keep the base tile relatively quiet. Add local storytelling with decals, vertex masks, mesh blends, or independently scaled macro variation. This separates reusable material structure from unique events. The seamless tileable textures guide explains seam repair and repetition control in more depth.
Directional surfaces need special care. Rotate gravel if it helps; do not rotate roof shingles, water runoff, brushed machining, or timber grain merely to hide repetition. Stochastic sampling can help organic materials, but it costs shader work and may soften intentional features. The cheapest solution is often a calmer base material.
Use a gate-based generative texture workflow
Do not polish every output. Move generative AI textures through small gates and stop spending time the moment a candidate fails.
- Define the brief. Record substrate, layers, scale, condition, distribution rules, exclusions, target maps, and destination engine.
- Generate contact sheets. Compare several low-cost candidates at the same scale. Select structure before chasing microdetail.
- Clean one source. Remove lighting, perspective, borders, accidental objects, and conspicuous repeating landmarks.
- Create the PBR set. Derive or generate maps from the approved source and align every feature.
- Check physical behavior. Test roughness, metalness, relief, and scale under neutral moving light.
- Tile and vary. Repair joins, inspect a large repeat, then add macro variation or decals only where needed.
- Export and import. Produce the correct normal convention, colour-space settings, filenames, and channel packing.
- Approve in context. Judge the compressed material in the actual scene, at actual camera distances, beside neighboring surfaces.
This pipeline makes production-ready AI textures cheaper because rejection happens early. A candidate with baked sunlight should fail before anyone hand-paints its roughness map. The calendar appreciates standards.
Review generative AI textures on controlled geometry
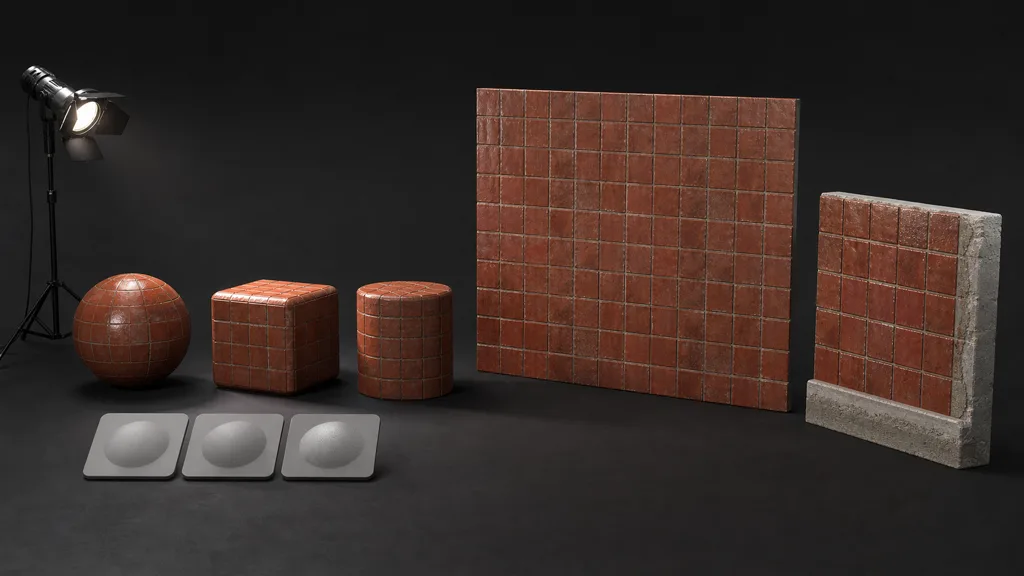
Use the same test scene for every set of generative AI textures. Include a sphere for reflection shape, a bevelled cube for edge and seam behavior, a cylinder for directional stretching, a repeated plane, a real-scale wall or floor section, and a movable neutral light.
An effective AI texture quality checklist scores five categories:
- Structure: no perspective, cropped objects, broken construction, or accidental borders.
- PBR logic: aligned maps, plausible roughness, correct metalness, and relief that matches visible form.
- Reuse: clean seams, controlled landmarks, stable macro variation, and documented metres per tile.
- Delivery: correct dimensions, bit depth, colour spaces, normal orientation, channel packing, and filenames.
- Context: appropriate value range, wear frequency, memory cost, and appearance under project lighting.
Inspect the final imported texture rather than the source PNG. Compression can damage normal maps, thin masks, and high-frequency fabric. Mipmaps can turn crisp microdetail into shimmer. Displacement can split geometry at UV seams. If the material only works in the generation preview, the preview is the product—not your texture.
Know where generation should stop
The best generative AI textures for 3D are not the most generated. Generative AI textures are one authoring method among several: use scanning when exact real-world evidence matters, procedural authoring when strict parameters and infinite resolution matter, hand painting when designed storytelling matters, and generation when fast exploration or a specific custom surface matters.
Preserve source masters as separate maps. Export copies for each renderer:
- Blender: use Non-Color for data maps, OpenGL tangent normals, and connect the maps through Principled BSDF. The Blender PBR materials guide covers the node setup.
- Unity: match the active render pipeline; Built-in, URP, and HDRP use different packing conventions. See Unity PBR textures.
- Unreal Engine: DirectX tangent normals and an RGB ORM texture are common, with sRGB disabled for packed data. See the Unreal Engine texture guide.
- Godot 4: OpenGL tangent normals are standard, while ORMMaterial3D accepts AO, roughness, and metalness in RGB. See the Godot texture guide.
License is another stop condition. Record the tool, plan, terms, source inputs, generation date, and output rights. If provenance cannot be explained to the person shipping the project, the material is not ready for the library regardless of how charming its moss appears.
FAQ
How do generative AI textures work?
Generative AI textures use a model to predict surface imagery from text, an input image, or both. A production tool may then derive or generate aligned PBR maps, but those maps still need checks for physical meaning, registration, scale, tileability, and engine settings.
Can generative AI create PBR textures?
Yes. It can create base colour, normal, roughness, height, AO, and metalness maps for a material. The maps are useful only when they describe the same features at the same coordinates and follow plausible material rules.
Are AI-generated textures tileable?
Some are generated edge-seamless, while others require offset-and-repair work. Even a seamless result can reveal a repeating grid through distinctive landmarks, so test it over a large plane and add macro variation separately.
How do I make AI textures look less repetitive?
Choose a quiet base tile, remove conspicuous landmarks, and test at least an eight-by-eight repeat. Add large-scale variation, decals, masks, or mesh blends independently instead of placing every unique event inside the repeating source.
What maps should a generated PBR material include?
Most opaque materials need base colour, normal, roughness, and metalness. Height and AO are optional, while opacity and emission belong only to surfaces that actually require them.
Can I use generative AI textures commercially?
Commercial rights depend on the current terms of the generator and the provenance of its inputs. Save the tool, plan, terms, source references, generation date, and license record with every accepted material.
What is the best generative AI texture workflow in 2026?
The best workflow defines physical constraints first, compares candidates cheaply, cleans one source, builds coherent maps, tests tiling and material response, and verifies the imported engine asset. Tool choice matters less than keeping those approval gates visible and repeatable.
Try CraftPBR
CraftPBR turns generative AI textures into an editable material workflow:
- Text-to-PBR creates a coordinated map set from a physical material description.
- Photo-to-PBR converts a captured surface into aligned base colour, normal, roughness, height, AO, and metalness maps.
- Node workspace keeps masks, tiling, ranges, and layers adjustable after generation.
- Engine export prepares map names, normal orientation, colour/data settings, and channel packing for Unity, Unreal Engine, Blender, and Godot.
- Free tier lets you test a complete material before adding it to a production library.
- CC0 output lets you use, modify, and ship generated materials without attribution.
Generate quickly. Approve slowly enough to notice what the light is doing.